Pages

Subscribe:

Ads 468x60px

Labels

About Me

Find Us On Facebook

Updates

Advertise Here

Thursday 30 June 2011

Different Nail Designs


Hello people! Finally blogspot started working again! LOL~


Today just a quick update for some of my recent manicures. I don't actually have a lot of time for blogging but I wanted to post it today, because here in Korea it is so rainy days. And I wanted to brighten up such gray days with those colorful pictures hahaha~


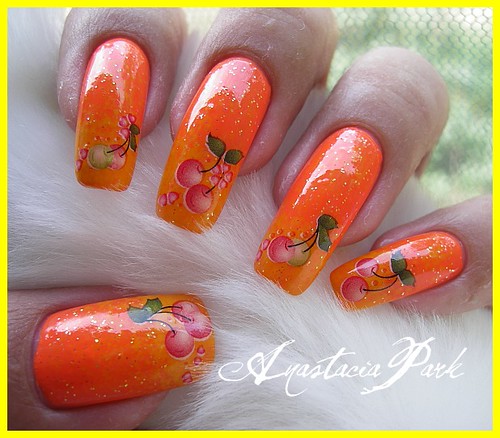
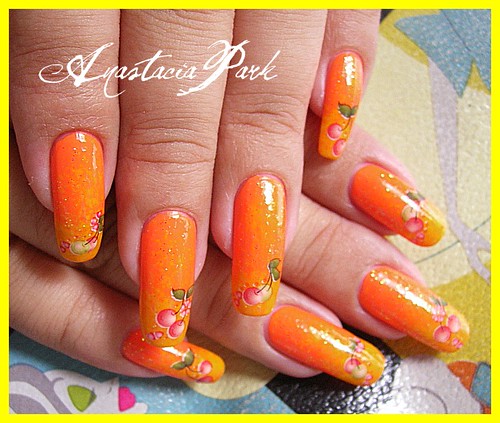
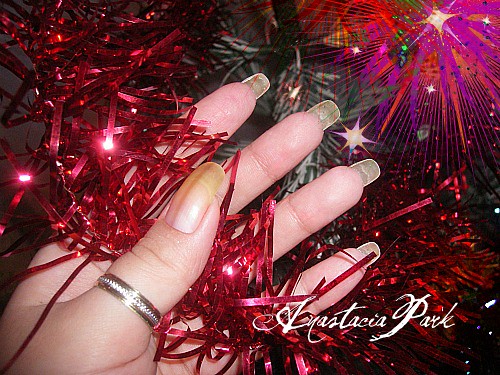
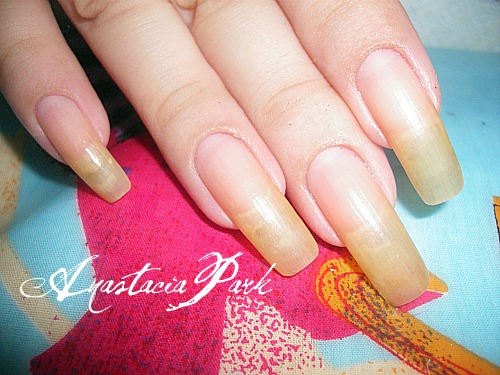
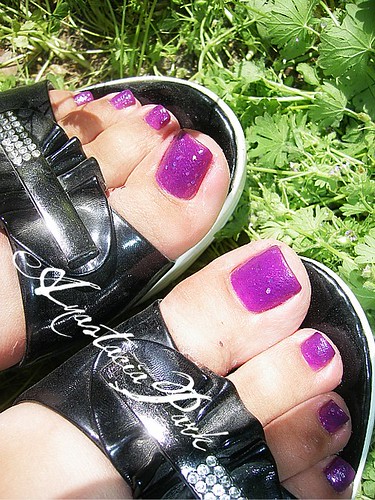
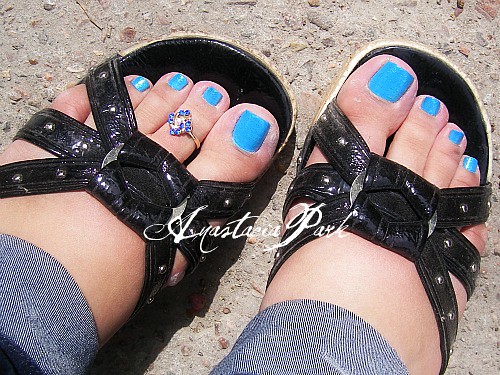
"SUMMER ACCENT NAILS"


Summer Nail Tips Accent 


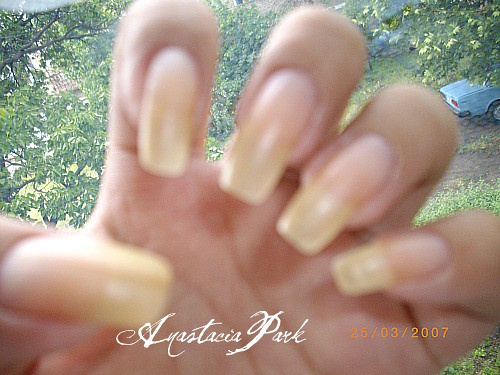
That was such a sunny day when I took these pictures :D


summer tips accent


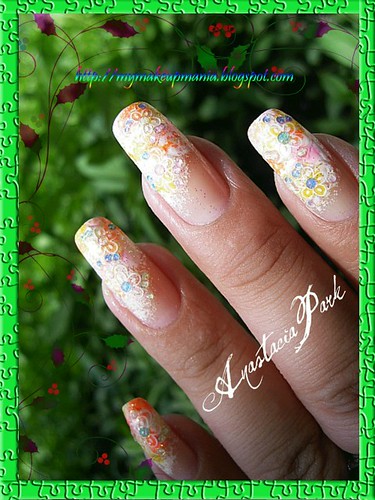
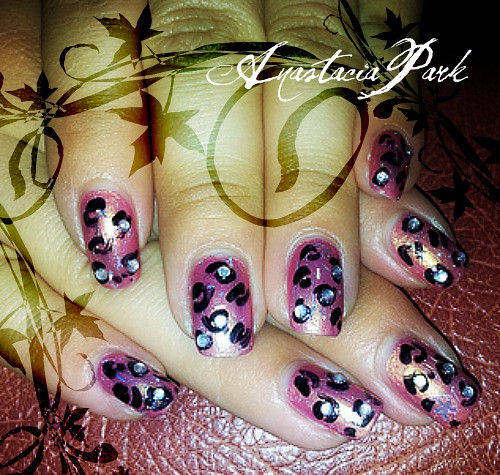
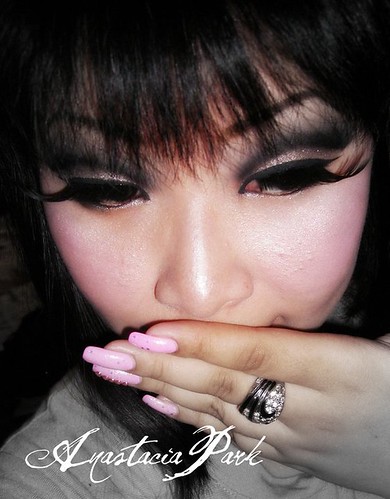
My NOTD. And this is one more copied nail art design. I used tartofraises nail tutorial. She is another amazing nail art artist who I love! Truely love! Such wonderful free hand nail designs! Very talanted girl! Absolutely amazing with every single design of her! 


Tartofraises's Nail Design

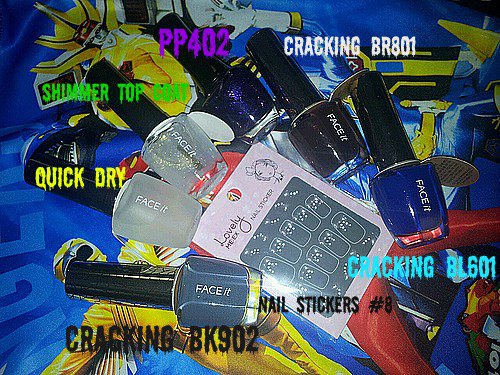
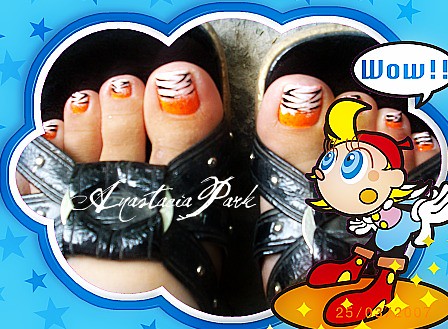
Also here is my toes color which I'm wearing right now. I used The Face Shop nail polish in BL605 from Nail Pleasure collection.

Image and video hosting by TinyPic


Also here is some of nail designs I've made for my sister Lena. She is very nice hand model, very like making manicures for her! A huge pleasure and for me and for her :D


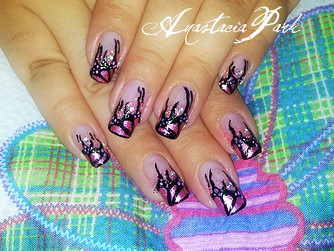
This one I called PUPPIES.


PUPPIES 


I used a sponge technique for background pattern and for the puppies I used an image plates + black special polish.
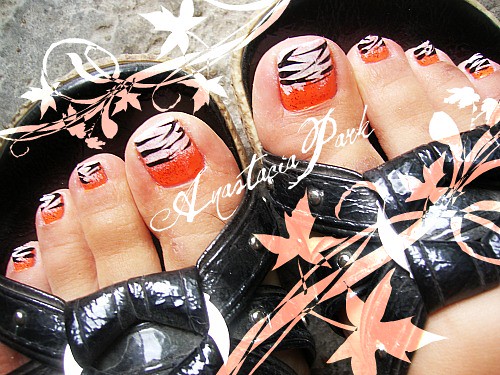
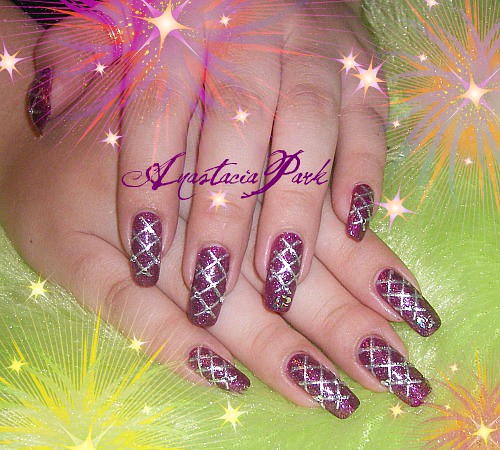

GRADIENT PATTERN.


Gradient Effect


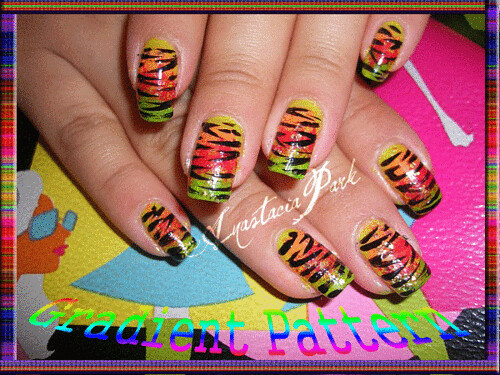
Again I used a sponge technique for colorful pattern and two way nail art pen in black for making the stripes.
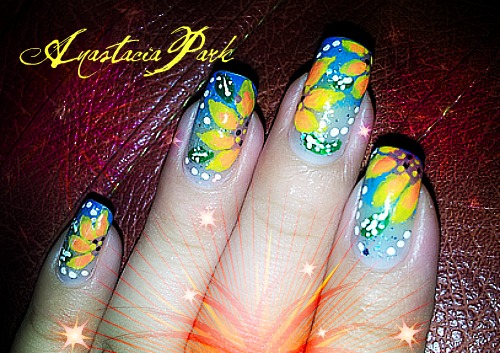
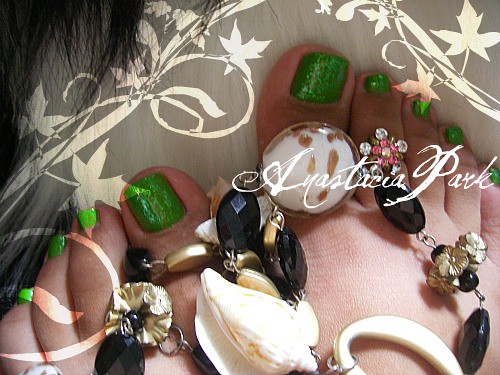
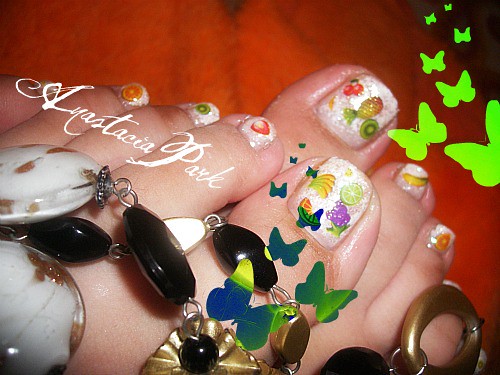
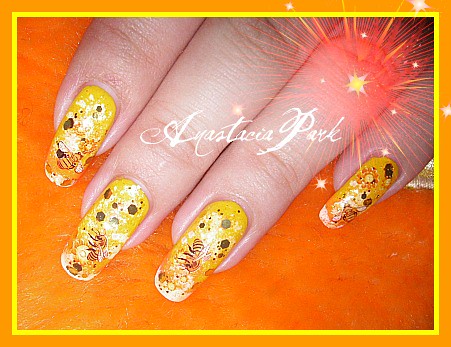
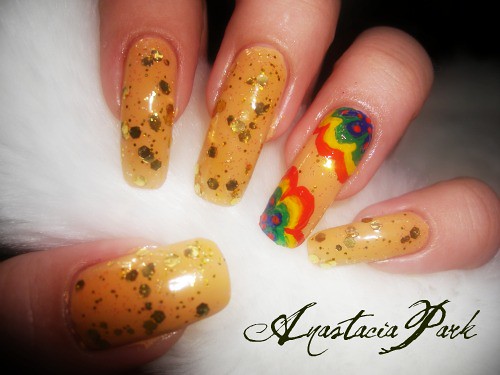
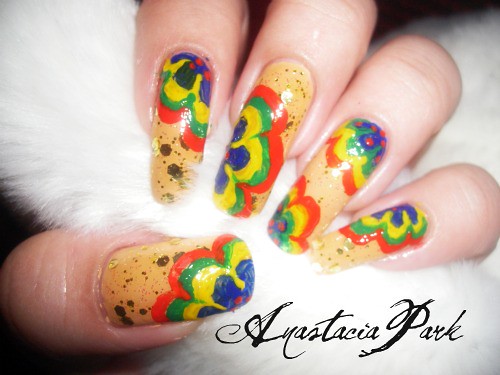
FLORAL PARADISE.


Floral Paradise


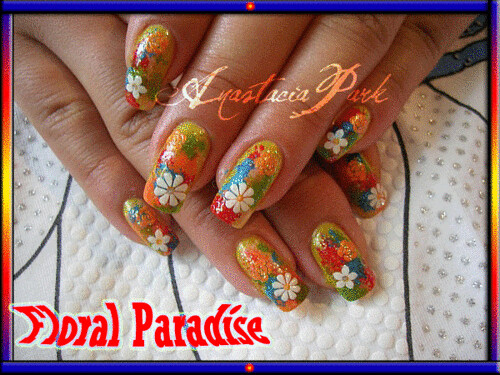
I sponged blue, orange, red and green nail polishes on top of yellow color. Put on some floral 3D nail stickers and top coat.


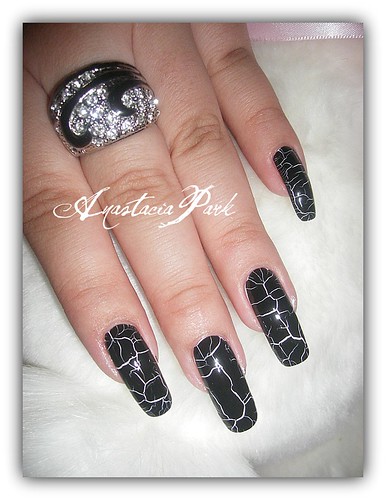
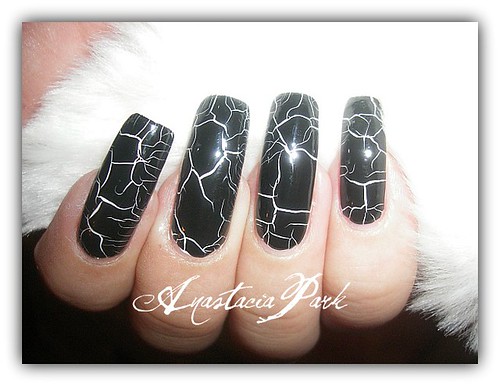
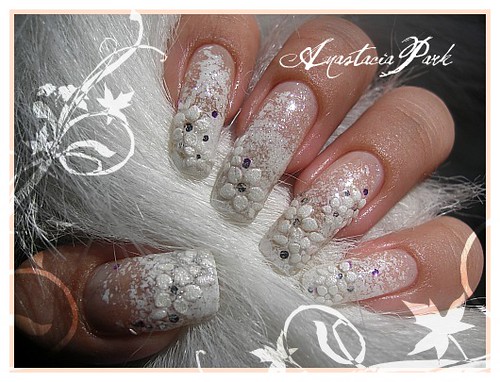
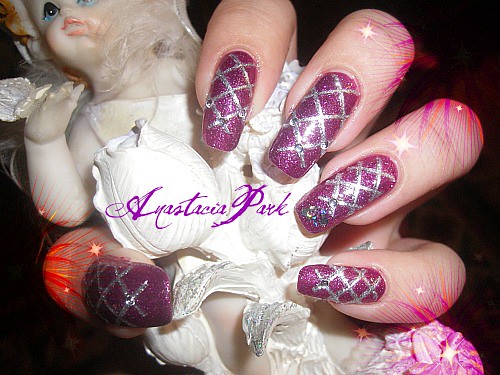
Here is a hand variant of my design in RUSSIAN GLINKA


RUSSIAN GLINKA 


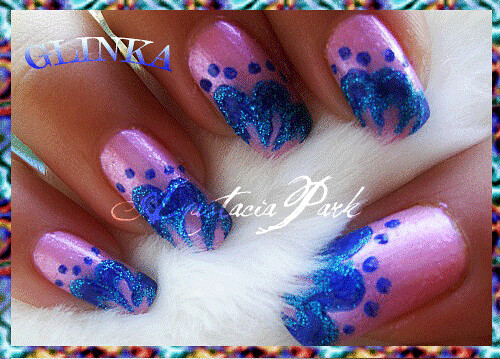
A few days ago I did the same design on my toes and it looked as pretty as on hands :D For this design I used acrilic paint in blue and nail art polish in glitter blue to contour those "petals".


Thats all for now. Thanx for looking and following my blog :D


Have a great week!

Tuesday 28 June 2011

CHERRY + Vacation HAULs


Hello everyone! This week goes so fast! At June 25 it was very first birthday party of my little son :) Yay! He is already 1 year old :D We also had a small foto session with both my sons :) It was such a great experience. I will show some professional *lol* pictures as soon as they will ready. Anyways, today, in my case tonight, I decided to show one of my previouse nail design which I did when stayed at my mom's place. 


"CHERRY NAILS" 


CHERRY


HOW TO DO:

1. First of all I used a base coat for my nails. After that I applied a neon orange polish in 2 coats.

2. Then I sponged a bit of a yellow color on the tips of my nails.

3. Applied a yellow shimmery/glittery jelly.consist nail polish on top of it.

4. Put on some cherry water decals and sealed with a top coat. Done!


CHERRY


And here is some of my new items which I bought at my mom's place. I really wanted to buy another brand of polishes but I couldn't find any of them :( Also I didn't used all of them, most of polishes are still new.


Nail art polishes with a long and thin brush; fimo wheel; nail art deco glitters.


Nail Art Nail Polishes


And yesterday I finaly visited The Face Shop store and bought some of new nail polishes. Cracking polishes in grey, blue and brown. Can't wait to use them :P


The Face Shop Goodies


I also bought a ton of other things, but seems like my google account glitching so crazy, all my pictures are simply disappeared :(


Thats all for now. 'till next time :D


Thanx for looking!

Monday 27 June 2011

NAKED NAILS


Hello everyone! Just a quick update for my new FACEBOOK page. Since I have a lot and lot of friends there I decided to start a new NAIL STORY page. It'll be easier for me to follow different nail lovers there. So please check out my new page on FACEBOOK coz the old one will be deleted tomorrow. Hope to see U there.


And as I promised I am back with my naked nails. Those are was took in a different time. Also my nails do have a yellow-ish undertone but I actually don't even care about it. Because simply, I don't wear naked nails in real life :)


December 2010


When I stayed at my mom's place I found such a nice product called Nail Growing Stimulator by Frenchi and it really helps me with nail growing! My nails getting long very fast!


Naked Nails


And before I back home I cut my nails shorter; at last May.


Naked Nails


Also I have just a few points of nail care to follow:

1. Always wear a coat of nail polish >_<

2. Always refresh nail edges each manicure by foiling them >_<

3. Always make ur cuticle and under nail area moisturized >_<


Love4Nails Idea


I am so excited today, my hubby just bought to me Sumsung Galaxy SII phone and I can take a pictures with it :D So here it is YAY! BTW, this is not my design, I just copied Love4Nails tutorial I LOVE her nails a lot! She is such a talant and gave a ton of inspiration!


Leopard Print


Here is a nails of my sister Lena. Just a simple leopard print design with a rhinestones :D This pic also was took with my new phone :D


Thats it for now! Have a great week!

Thursday 23 June 2011

PEDICUREs


Hello everyone! For the last few months I've did my toe nails kindda normal shape. Because I always had a "grow-in" edges and finally they began growing absolutely normally :D Yay! Kindda excited coz I don't have all those unpleasant and painful feelings anymore! So now I can make some pedicures and toe nail arts :D Very happy :D And here it is...


"RUSSIAN GLINKA" 


PRODUCTS USED:


Catherine Arley Nail Lacquer #706


Acril Paint in Emerald Green


Emily Nail Enamel #2


HOW TO DO:


1. Apply light yellow nail polish as a background color.


2. With a thin detail brush draw some petals kindda shapes on big toes and make some random dots on the rest of toes.


3. Seal everything with a yellow glittery (jelly consistency) nail polish.


Pedi Art 


"ZEBRA STRIPES"


PRODUCTS USED:


Emily Nail Enamel #47


HOW TO DO:


1. Apply bright orange nail polish as a background color.


2. Sponge some white polish on the tips of toes.


3. Apply jelly glittery orange polish on top of everything.


4. Make some zebra print on top of the white tips and apply top coat on.


Zebra Stripes


The Face Shop nail polish from Lovely Me:ex collection in GR502 + China green flakies nail polish (no name)


Pedicure


The Face Shop Lovely Me:ex collection nail polish in PP403 + Loreal Magic Color Crystal Sparkling nail polish


Pedicure


Golden Rose nail polish #18 + Needme Golden glitters nail polish #327


Pedicure


The Face Shop Lovely Me:ex in BL602 + Golden Rose #111 rainbow glitters nail polish


Pedicure


This one looks a little bit bad because of the sponge effect. I sponged creame white nail polish all over my toes and put on some water decal with a fruits. Yeah... sponged toes looks not good on me lol~


Fruit Water Decal


I think thats everything I wanted to show. And because I don't have a camera right now, mine is broken :( I can't post a new pics with my nails, just sharing with what I have :P

Next blog update will be about my nail care with some naked nail pictures.


Thanx for looking and have a nice day <3

Cracking Black Nail Polish


HI everyone! Just a very quick update for my recent manicure. This BK cracking nail polish I've got from my very dear friend Thriszha :D And I very do like it! It cracks very nicely!


Also I got questions about my nails and I'm gonna to do a blog post with my naked nails and nail care very soon.


Cracking Nail Polish 


Black Cracking Nail Polish


Thats it for now. Thanx for looking and have a great day :D

Tuesday 21 June 2011

WEDDING STYLE NAIL DESIGN + 10% OFF COUPON CODE


HELLO everyone!

First of all I want to share that I found such a nice online shop store for a lot of make-up and nail art stuff! Yay! Just go and check out BornPrettyStore and use 10% OFF Coupon Code PAJ61 :D Worldwide Free Shipping Store!!


Also I just want to say huge thanx to my new followers and to all my readers for supporting me and my blog. I'm very thankful for ur sweet comments BUT because my google account have some troubles I can't log in and send some words back :( 


Anyways today I'm back with such cute design which I called "WEDDING STYLE NAILS". I think this design suits nicely for wedding day :P


Wedding Nail Design


PRODUCTS USED:

Frenchi Smart Enamel NAIL GROWTH STIMULATOR

Golden Rose nail polish #33

The Face Shop Lovely Me:ex collection in WH002

AISAI clear nail polish

3D nail stickers for white flowers and sponge


HOW TO DO:

1. Apply ur base coat then use any sheer milky nail polish as background color.

2. Take a piece of sponge and randomly apply creamy white nal polish on tip of ur nails and a bit above.

3. Put on some white flower stickers and seal the deal whith a top coat. DONE!


Wedding Style Nails


Thas it for this mani. Simple huh? But looks very adorable. Do U think it is?

Sunday 19 June 2011

BEES


Hey everyone! I have noticed that I can't leave a comments on different google sites but blogspot. Anyways, for my 25th b-day I've made this make-up. Sort of cut the crease look using Sleek palette in Storm and did those nails as well using Olivia nail polish #110 such Barbie Pink color. 

Hahaha~ I like how looks those fake eyelashes, but I can see nothing through them lol~


Me...


"BEES" nail art design using a water decals. I've got a request for step-by-step for this design. So, I'll try to explain more details


PRODUCTS USED:

VoV NAIL STRENGTHENER SOLUTION

THE FACE SHOP LOVELY ME:EXD in 702 

THE FACE SHOP LOVELY ME:EX in WH002

ECLIPSE in BIKINI ORANGE

NEEDME (China Nail Polish) #28

AISAI #026 (Clear Nail Polish)

WATER DECAL


HOW-TO DO:

1. Apply a base coat and main yellow creame nail polish.

2. Take a sponge, put on some bright orange color and apply it randomly all over ur nail plate.

3. Do the same with a white nail polish. Try do not make a huge spots. It must be small and not intrusive.

4. Seal all this with a nail polish which has some gold glitters, kinnda some honey inspiring.

5. Put on water decal with bees and apply top coat to finish the manicure.


Bees Bees


Thats all for now!

What do U tink about this design?

Friday 17 June 2011

The Face Shop Face & It PP404


Hey everyone! Recently I noticed that my Google account have some problems and I can't comment on other blogs :(


Anyways today I'm back with this design using some of The Face Shop products: Face & It nail polish in PP 404 and Nail Stickers. I can say that both of the products are so nice and worth to try out them!


Here is my FULL MANI 


The Face Shop  


LEFT HAND


the Face Shop 


Also I took a picture of my NAKED NAILS. Plese, ignore that date, it's not right lol~ 


My naked nails 


And my very first toe nails picture. I made some design using orange and white nail polish also black nail art polish with a thin brush.


toe nails


Thats all for now :) 'till next time! Have a great time :D

Thursday 16 June 2011

I'm BAAAACK :) Acrylic nail design.


HELLO everyone! Yes, I'm back and I missed all of U so so much! Very glad to start blogging and sharing some nail designs again, because I have a ton of new and cute pictures to show and a lot of contests with a nice prizes comes very soon :)


This is my first try with an acrylic paints. I bought some colors during my vacation.   


 Flower Flowers


Thats all for now and I just want to say thank U for supporting my blog :) Very do appreciate it!